前言
在uniapp日常开发的过程中经常会有局部滚动的需求,而scroll-view组件正好可以满足这一需求。需注意在webview渲染的页面中,区域滚动的性能不及页面滚动。
纵向滚动
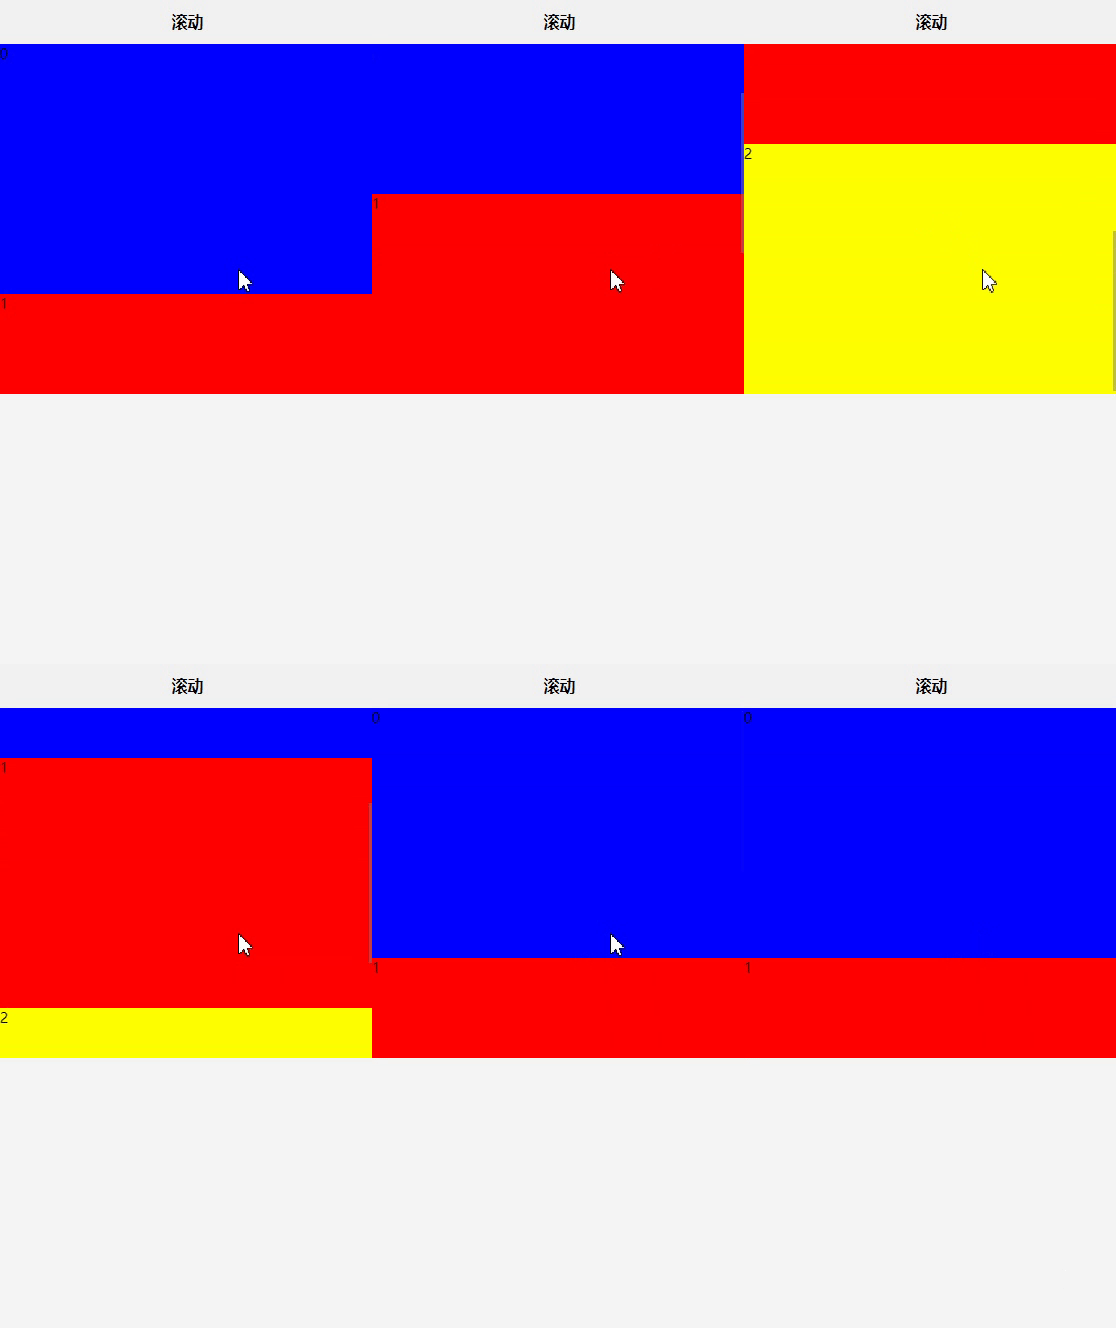
将scroll-view组件中的属性scroll-y设定为true开启纵向滚动功能,给scroll-view设置一个高度,当内容高度大于scroll-view高度时即可开启滚动功能(内容高度小于scroll-view高度时无法体现滚动功能)
实现代码:
<template>
	<view>
		<scroll-view scroll-y="true" style="height: 700rpx;">
			<view v-for="(item,index) in 3" style="height: 500rpx;" :style="{ backgroundColor: colorList[index]}">
				{{index}}
			</view>
		</scroll-view>
	</view>
</template>
<script>
	export default {
		data() {
			return {
				colorList:["blue","red","yellow"]
			}
		},
		methods: {
		}
	}
</script>
<style>
</style>
效果图:
横向滚动
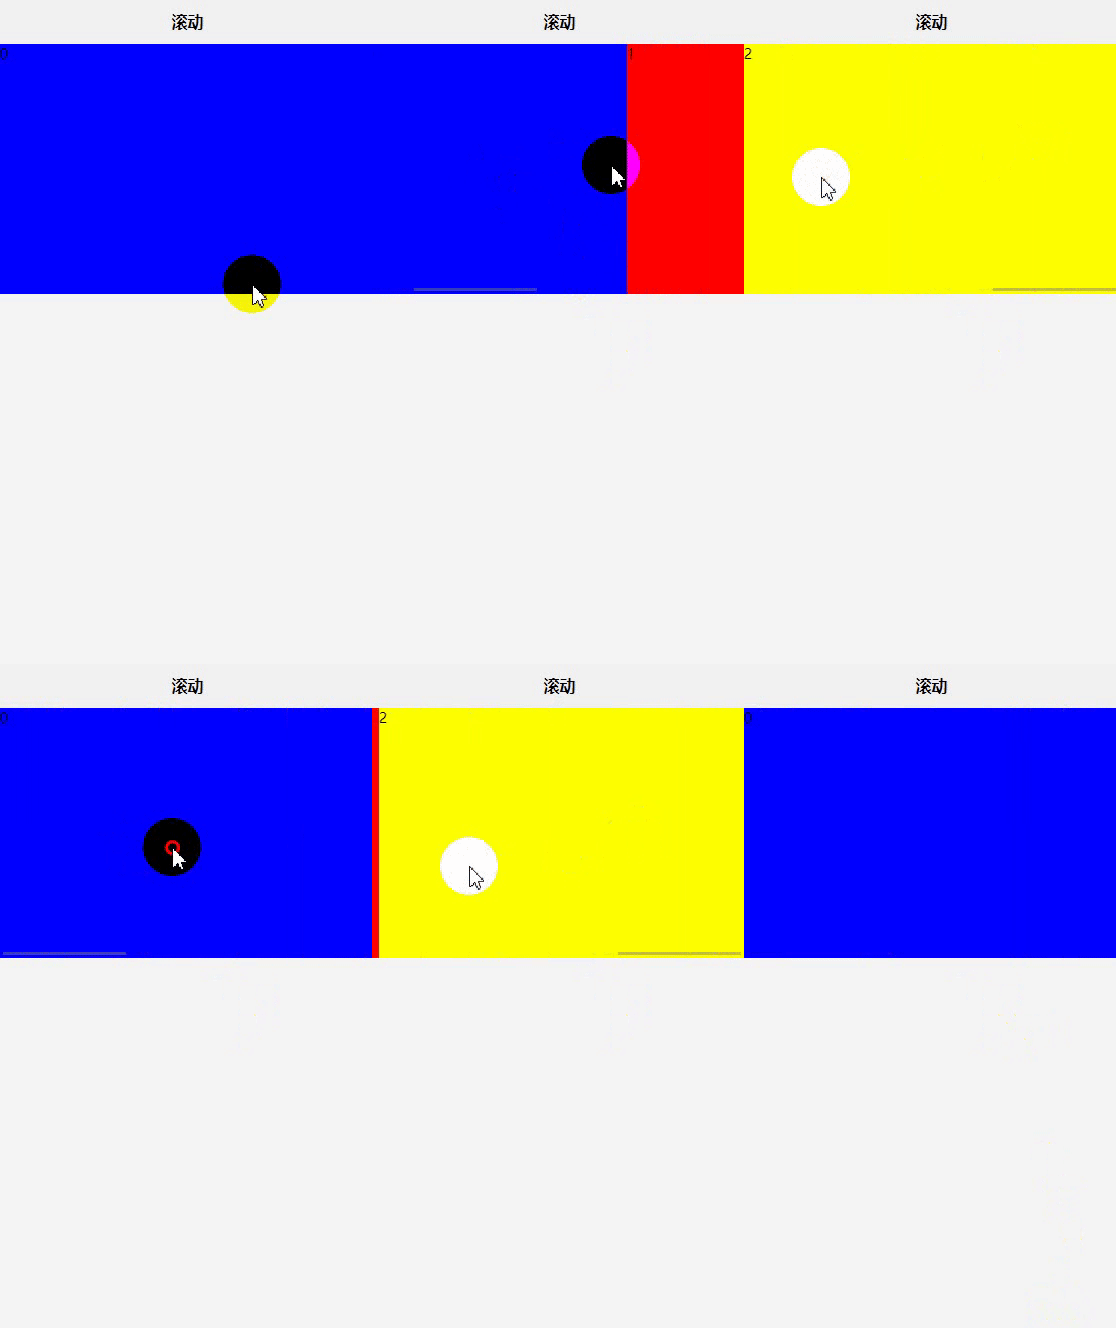
将scroll-view组件中的属性scroll-x设定为true开启横向滚动功能,给scroll-view设置一个宽度,当内容宽度大于scroll-view宽度时即可开启滚动功能(内容宽度小于scroll-view宽度时无法体现滚动功能)
注意:scroll-view本身的display:flex不生效、如果想实现display:flex功能,则可以给scroll-view加上white-space: nowrap,给内容容器加上display:inline-block
实现代码:
<template>
	<view>
		<scroll-view  scroll-x="true" style="height: 500rpx;white-space: nowrap;">
			<view v-for="(item,index) in 3" style="height: 500rpx;width: 100%;display: inline-block;" :style="{ backgroundColor: colorList[index]}">
				{{index}}
			</view>
		</scroll-view>
	</view>
</template>
<script>
	export default {
		data() {
			return {
				colorList:["blue","red","yellow"]
			}
		},
		methods: {
		}
	}
</script>
<style>
</style>
效果图:
锚点定位
当我们已进入页面就需要滚动到某一个元素的时候,锚点定位就可以很好的帮助我们定位并滚动到指定位置
将scroll-with-animation设定为true开启动画效果、对scroll-into-view进行动态绑定
注意:scroll-into-view绑定的值得是字符串,使用其他类型则会报错
实现代码:
<template>
	<view>
		<scroll-view  scroll-x="true" style="height: 500rpx;white-space: nowrap;" scroll-with-animation="true" :scroll-into-view="'scroll'+scrollId">
			<view v-for="(item,index) in 3" style="height: 500rpx;width: 80%;display: inline-block;" :style="{ backgroundColor: colorList[index]}" :id="'scroll'+index">
				{{index}}
			</view>
		</scroll-view>
	</view>
</template>
<script>
	export default {
		data() {
			return {
				colorList:["blue","red","yellow"],
				scrollId:1
			}
		},
		methods: {
		}
	}
</script>
<style>
</style>
效果图:
触底事件
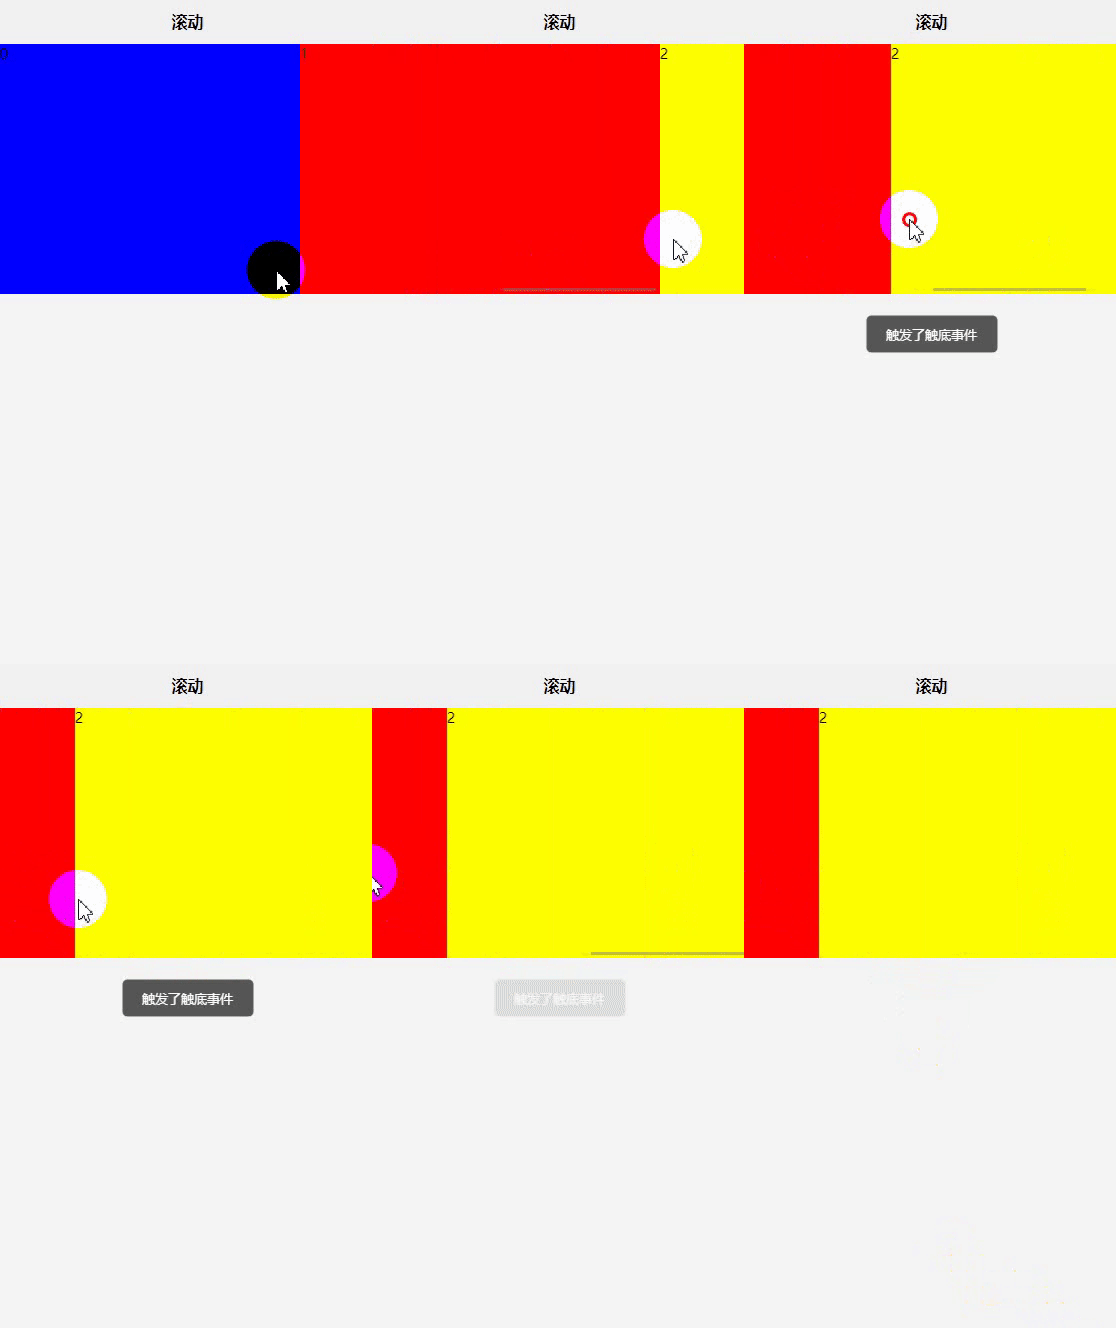
在滑动的数据需要懒加载的时候,我们就需要通过用户滑动到底部时触发懒加载方法,通过绑定scrolltolower方法即可实现纵/横触底时触发懒加载方法
实现代码:
<template>
	<view>
		<scroll-view  scroll-x="true" style="height: 500rpx;white-space: nowrap;" @scrolltolower="onReachScollBottom">
			<view v-for="(item,index) in 3" style="height: 500rpx;width: 80%;display: inline-block;" :style="{ backgroundColor: colorList[index]}">
				{{index}}
			</view>
		</scroll-view>
	</view>
</template>
<script>
	export default {
		data() {
			return {
				colorList:["blue","red","yellow"],
			}
		},
		methods: {
			onReachScollBottom(){
				uni.showToast({
					title:"触发了触底事件",
					duration:1500,
					icon:"none"
				})
			}
		}
	}
</script>
<style>
</style>
效果图:
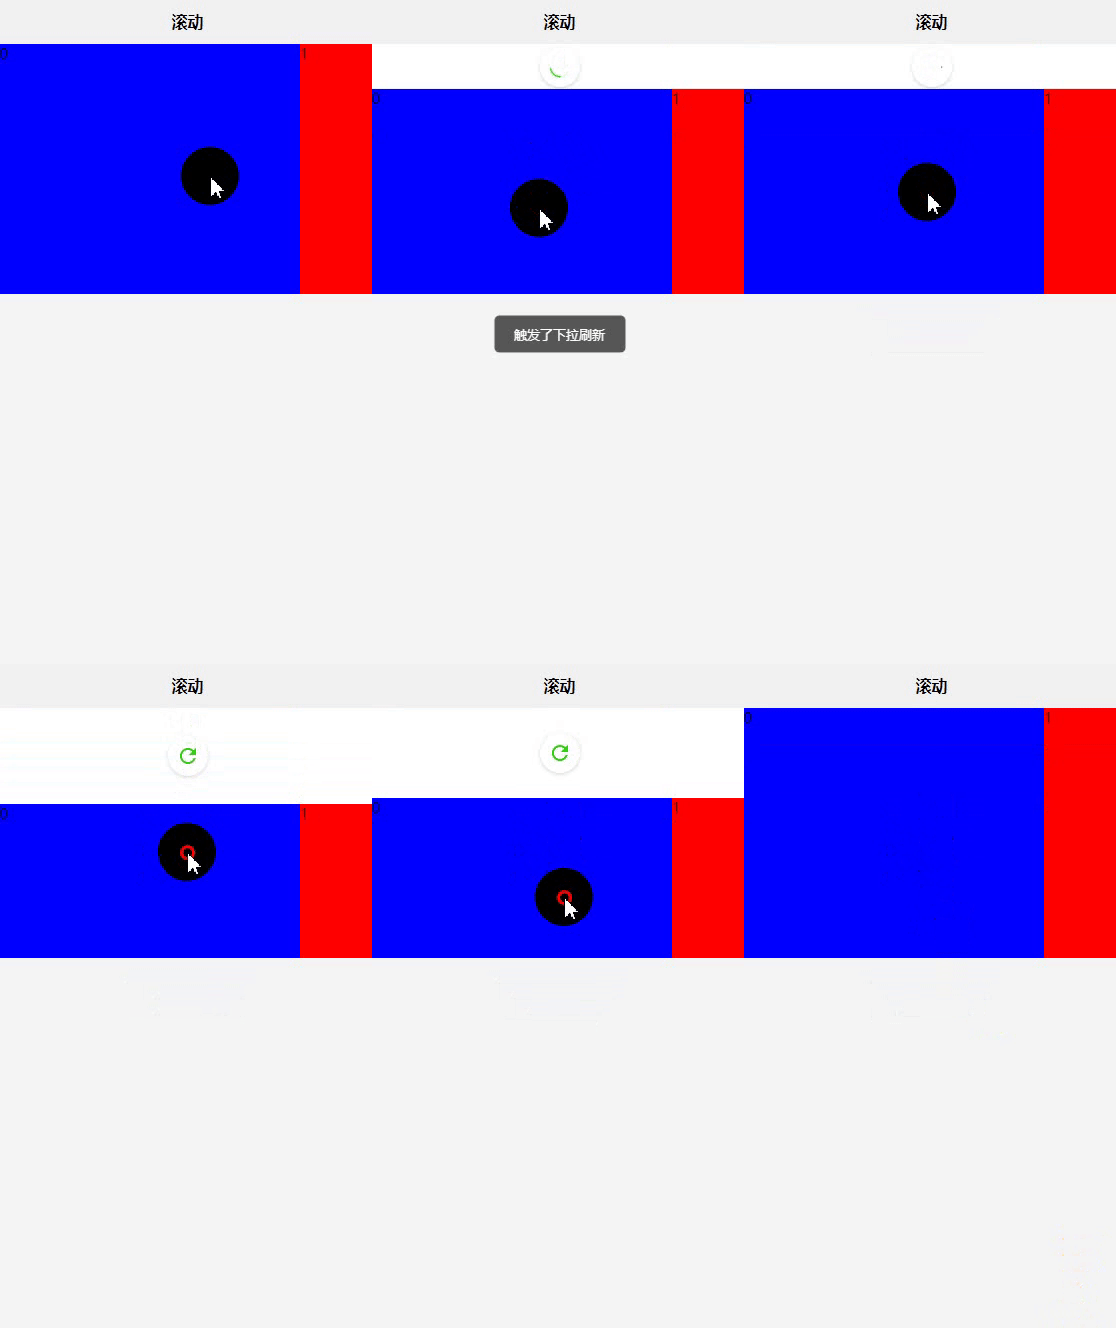
下拉刷新事件
scroll-view组件也可以满足我们下拉刷新的需求、首先通过设置refresher-enabled为true开启下拉加载、动态绑定refresher-triggered对下拉加载的状态进行控制、绑定refresherrefresh触发下拉刷新事件
实现代码:
<template>
	<view>
		<scroll-view scroll-x="true" style="height: 500rpx;white-space: nowrap;" refresher-enabled="true" :refresher-triggered="refresh" @refresherrefresh="onRefresh">
			<view v-for="(item,index) in 3" style="height: 500rpx;width: 80%;display: inline-block;" :style="{ backgroundColor: colorList[index]}">
				{{index}}
			</view>
		</scroll-view>
	</view>
</template>
<script>
	export default {
		data() {
			return {
				colorList:["blue","red","yellow"],
				refresh: false
			}
		},
		methods: {
			onRefresh() {
				this.refresh= true;
				uni.showToast({
					title:"触发了下拉刷新",
					duration:1500,
					icon:"none"
				})
				// 这里不能直接让refresh直接为false,否则可能会发生下拉加载无法复位的情况
				setTimeout(() => {
					this.refresh = false;
				}, 500)
			}
		}
	}
</script>
<style>
</style>
效果图:
总结
以上就是我整理的scroll-view的基础用法、想要了解更多的用法可以前往uniapp scroll-view部分进行了解
